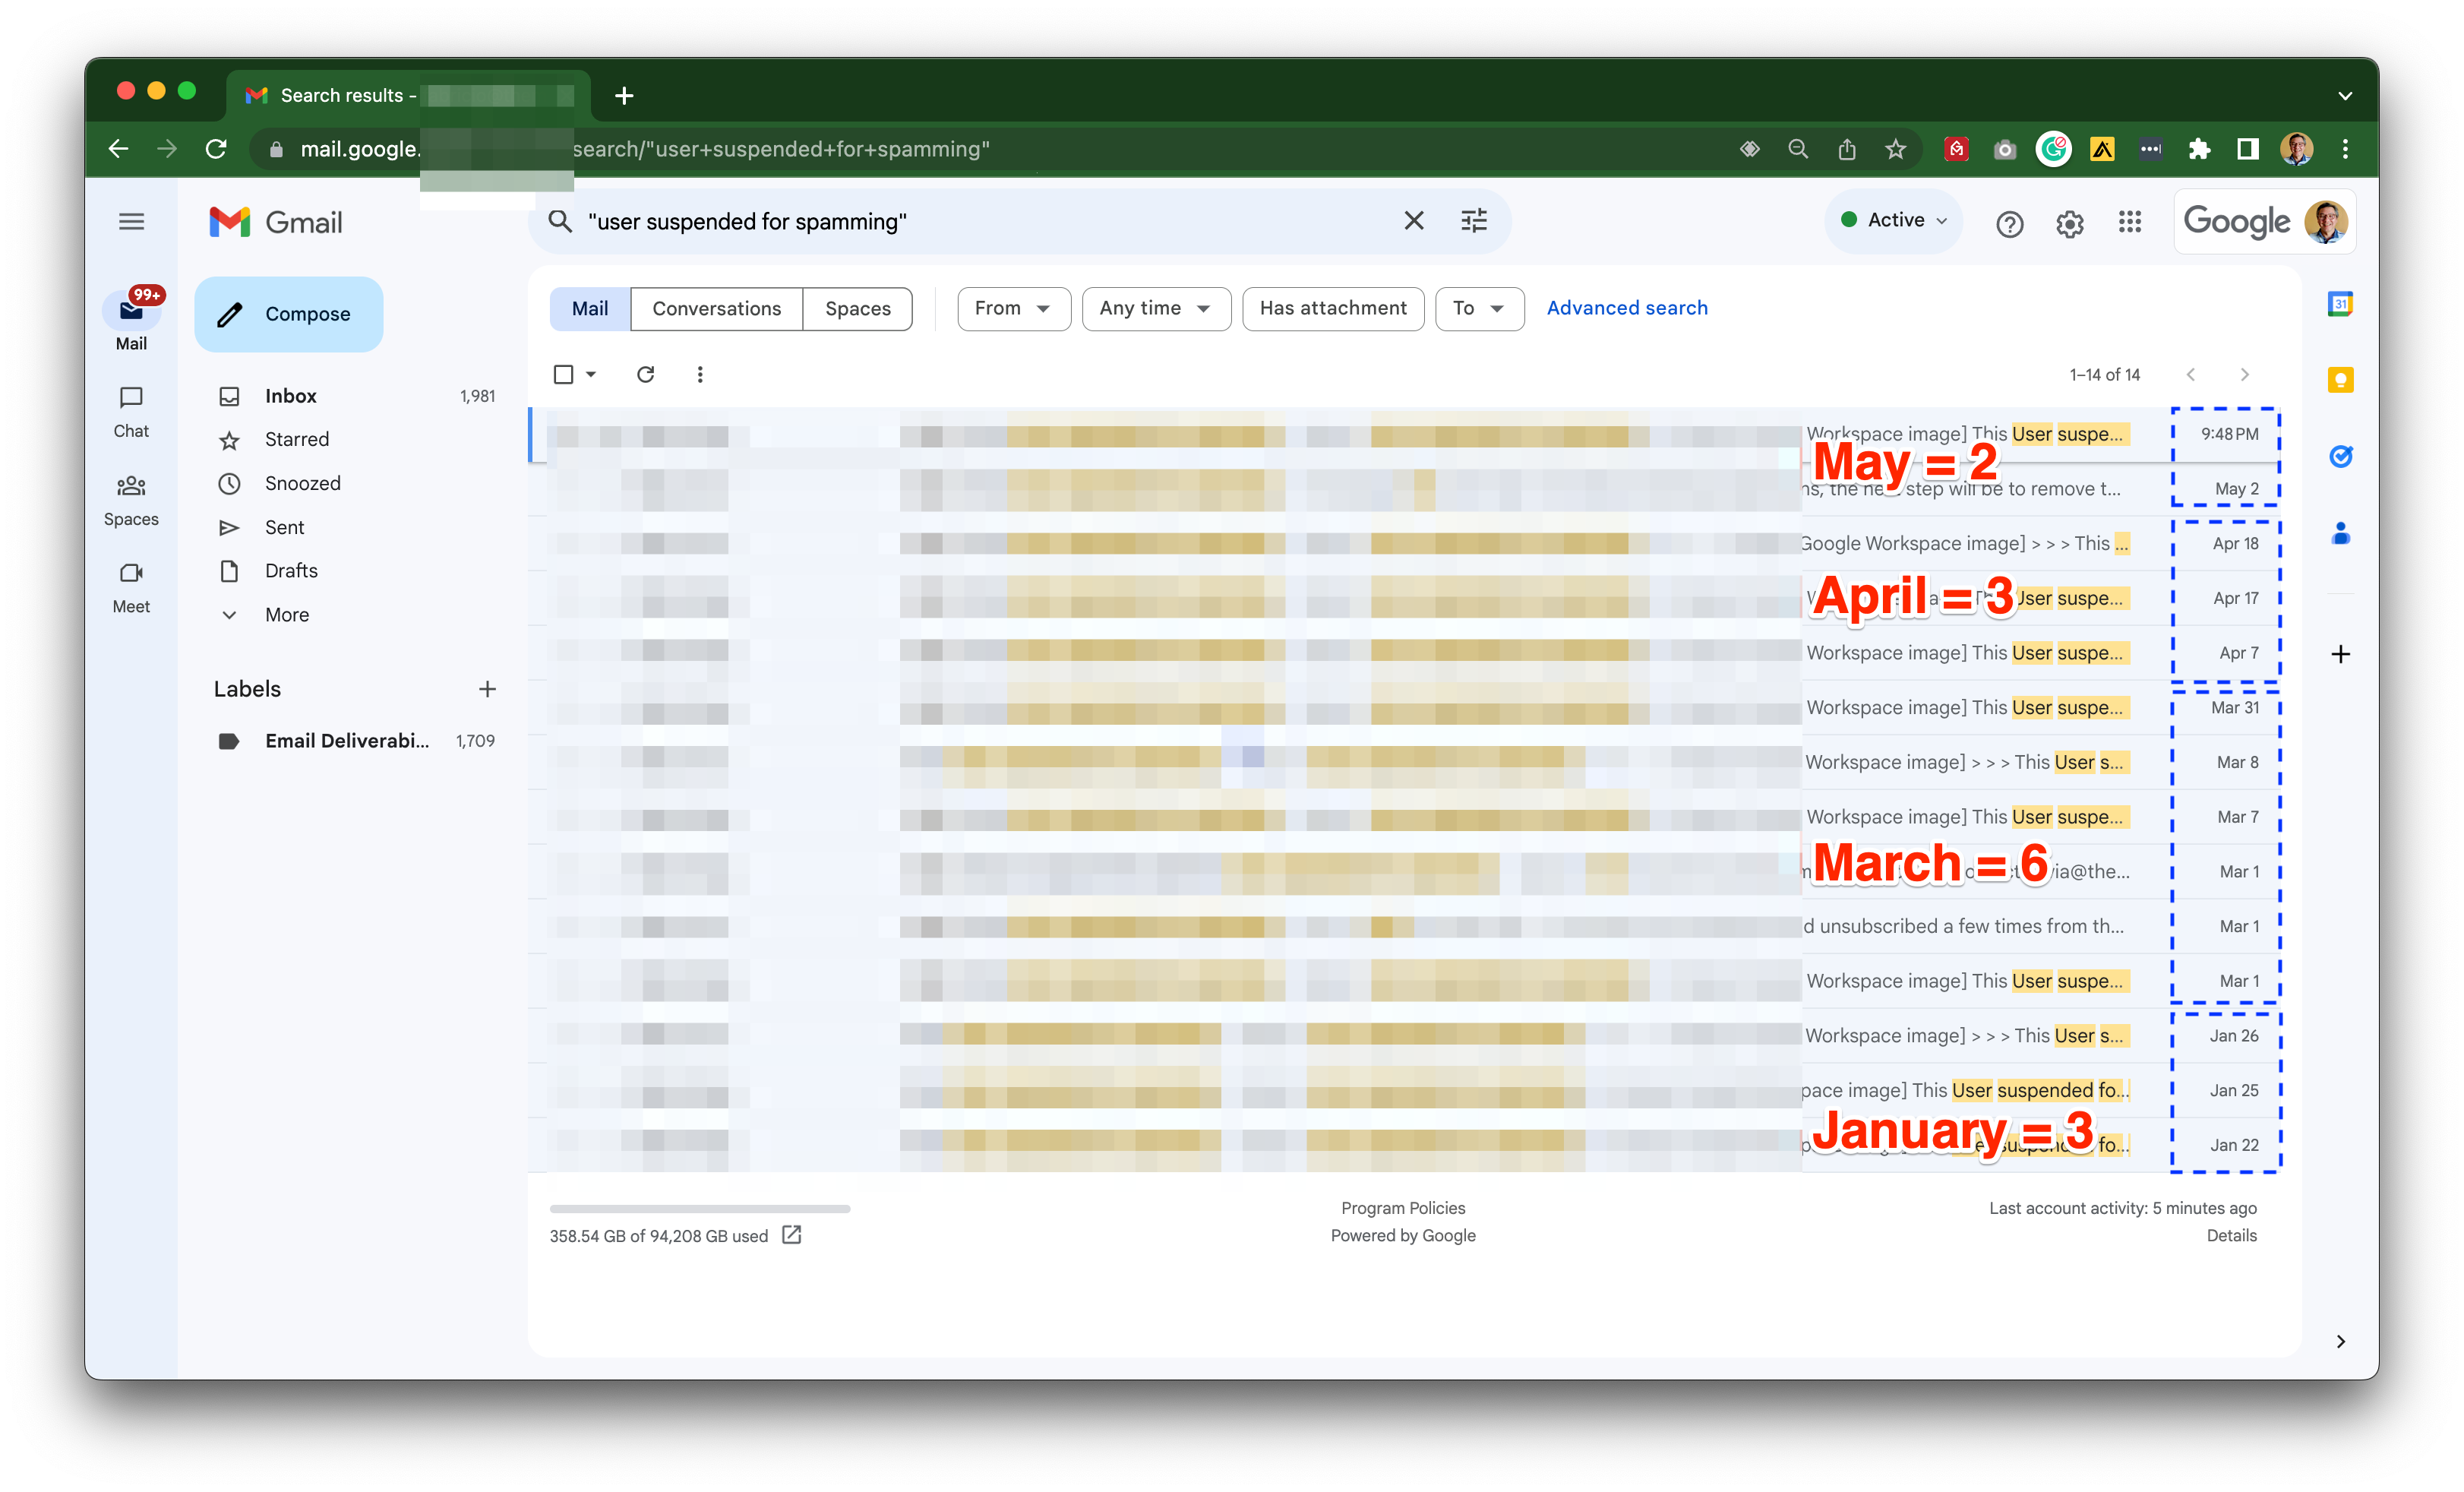
You can easily manage more than one email account in Gmail (or Google Workspace). It’s handy for those who execute cold email campaigns and use alternate email accounts to reach out.
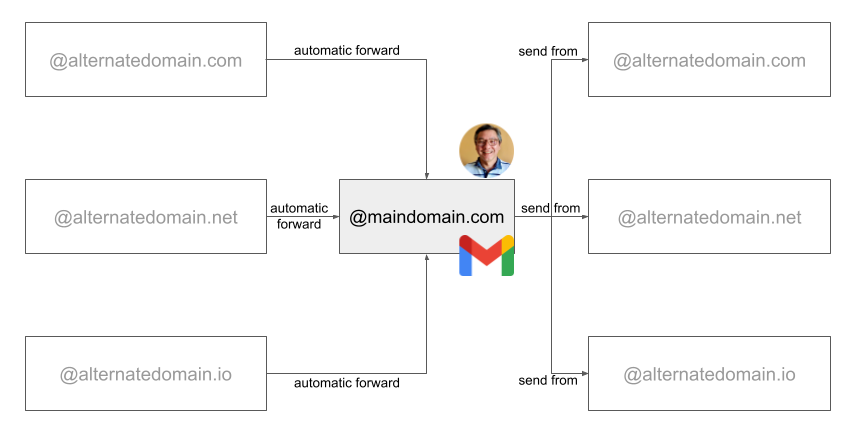
You won’t have to log into every alternate email account to get your messages!
First, we must set up a “send from” (or “reply as”) feature to allow you to reply from your main email account using your alternate email account as the sender.
Then, we have to set up a filter or a rule to forward the messages from your alternate email account to your main email account.
Please, make sure your Google Workspace Allow per-user outbound gateways and Less Secure Apps.
Set up the “Send From” feature
After finishing this section, you’ll be able to send messages from your Gmail, selecting your alternate email as the message’s sender (“From” field).

Step-by-step instructions:
1) Open your Gmail. Click on the gear at the top right.
2) Click on See all settings on the right.
3) Click on Accounts at the top.
4) In the section Send mail as click on Add another email address.
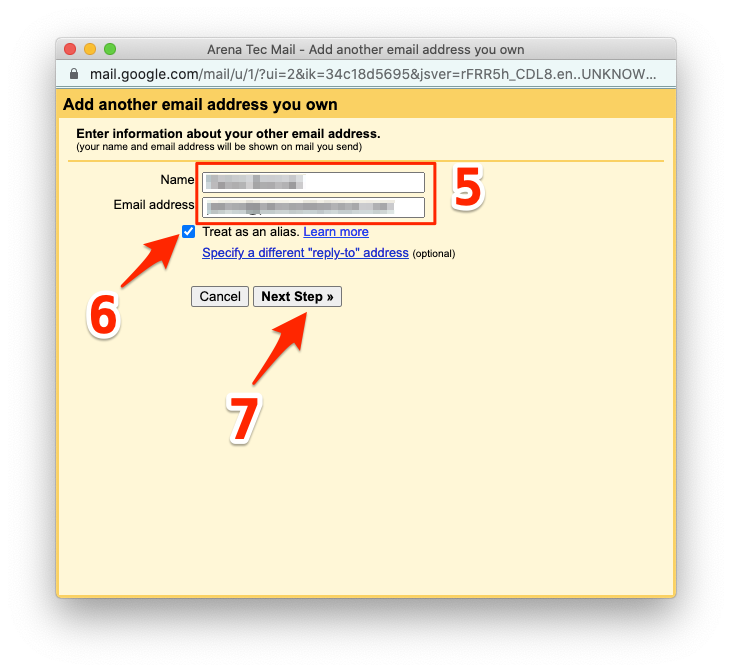
5) Fill with the information of your alternate email address.
6) Make sure to check Treat as an alias.
7) Click on Next Step. (If you receive an error with this message — “Functionality not enabled. You must send through alternate-domain.com SMTP servers when you send as [email protected]. However, this functionality is not available for your account. Please contact your domain administrator for more information.” —, you need to enable the external SMTP setting in your Google Workspace as indicated in this article.)
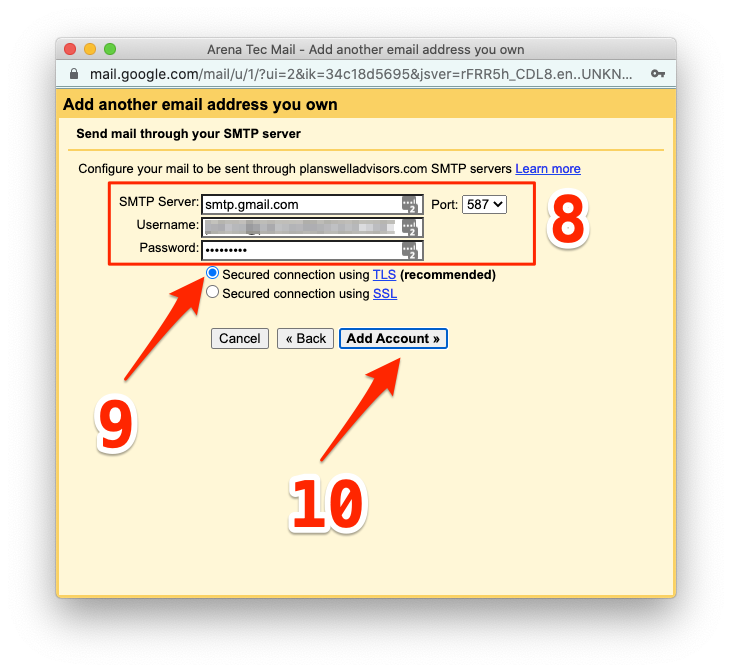
8) Fill with the following information:
8.1) If your alternate email is a Google Workspace account:
- SMTP Server: smtp.gmail.com
- Username: your alternate email address
- Password: your password
- Port: 587
8.2) If your alternate email is a Microsoft 365 account (make sure you have SMTP AUTH enabled and also check your Security Defaults settings):
- SMTP Server: smtp.office365.com
- Username: your alternate email address
- Password: your password
- Port: 587
8.3) If your alternate email is from a different Email Service Provider (ESP), please follow its instructions.
9) Check Secured connection using TLS (recommended)
10) Click on Add Account
11) Click on Close window.
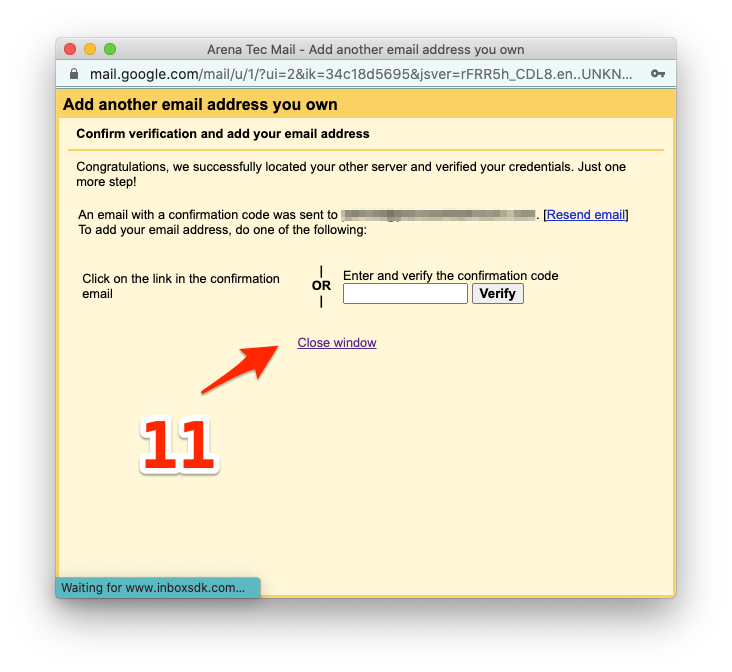
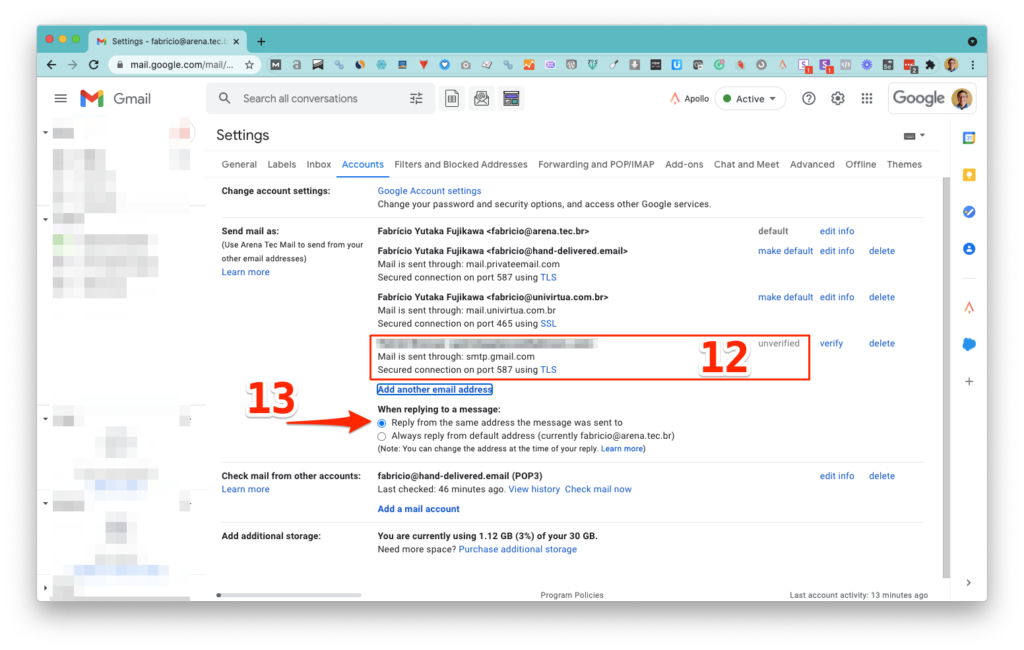
12) You should now have your new account listed in the section Send mail as with the status Unverified.
13) Make sure the option Reply from the same address the message was sent to is selected.
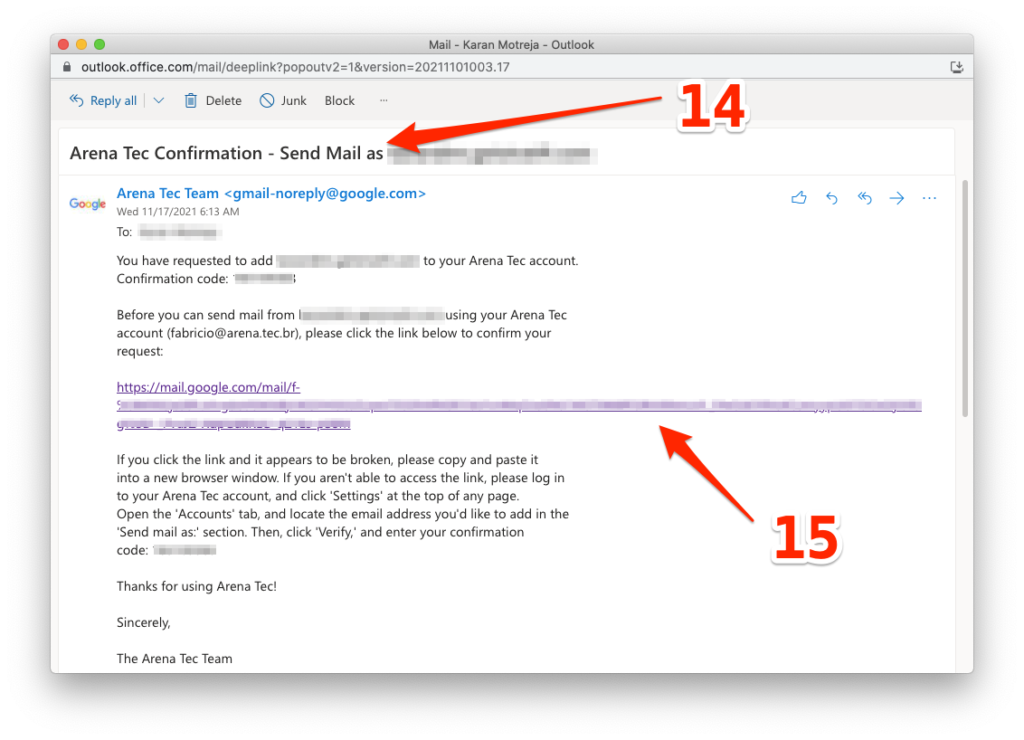
14) Now, you have to confirm in your alternate email address that you’ve authorized the operation. Locate an email from [email protected], with the subject “… Confirmation – Send Mail as …”
(If you’re a client from UniVirtua, please, just send an email with a screenshot showing the account configured in step 12 to [email protected]. I’ll proceed to change the status to “verified.”)
15) Click on the long link of the message.
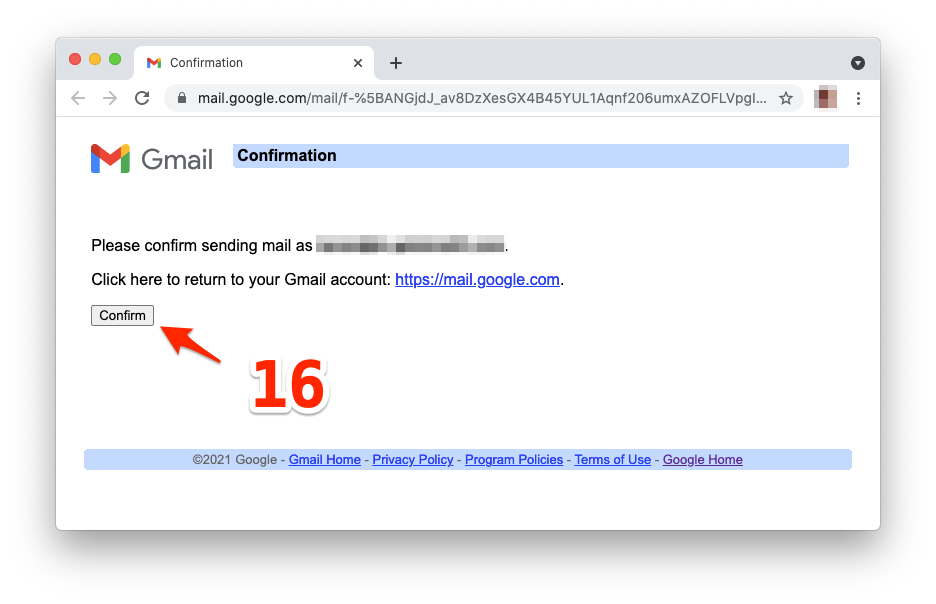
16) Click on Confirm.
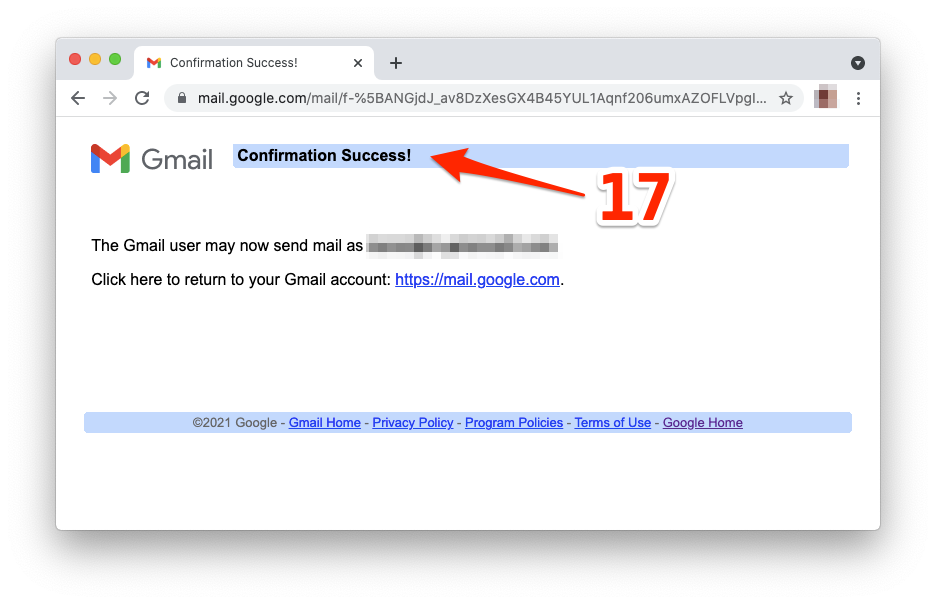
17) Make sure you see the Confirmation Success message.
Automatically forward from your alternate email to the main email address
(The following steps are necessary only if you use Google Workspace as your alternate email account. If you use Microsoft 365, set up mail rules instead, and make sure you’ve used PowerShell to run the command Enable-OrganizationCustomization after the Connect-ExchangeOnline -UserPrincipalName your_admin_email@your_domain.com, and enabled the Automatic Forwarding in the Anti-spam policies. If you use another Email Service Provider, please follow its specific instructions.)
Log into your alternate email address.
Click on the gear at the top right.
Click on See all settings on the right.
Click on Forwarding and POP/IMAP.
In the section Forwarding, select the option “Forward a copy of incoming mail to” and fill in with your main email account.
Select the option to keep Gmail’s copy in the inbox.
Click on Save Changes.
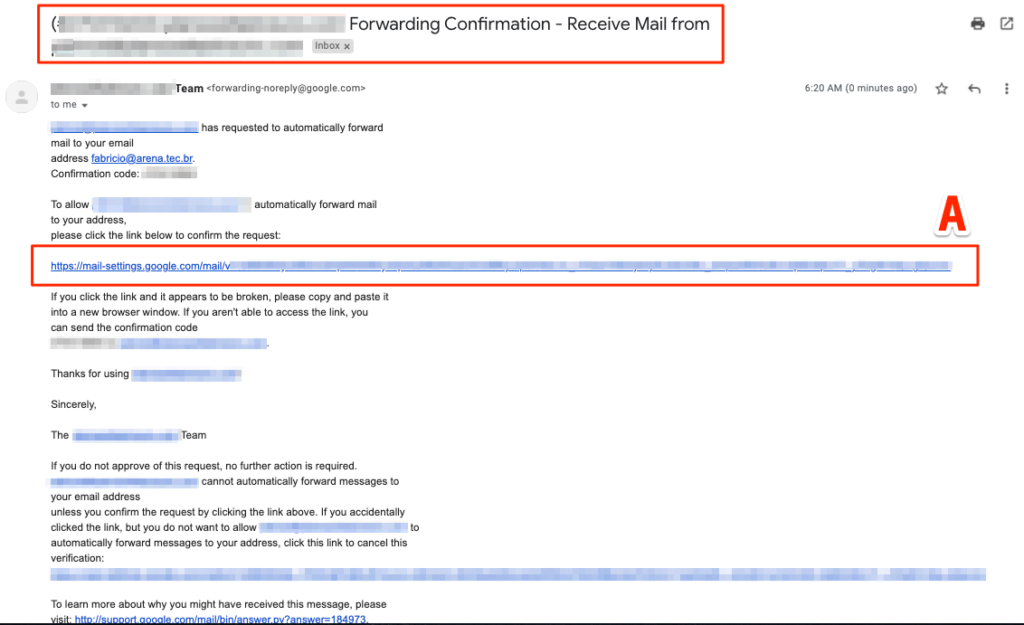
A) Locate an email with the subject “… Forward Confirmation – Receive Mail from …” and click on the long link of the message.
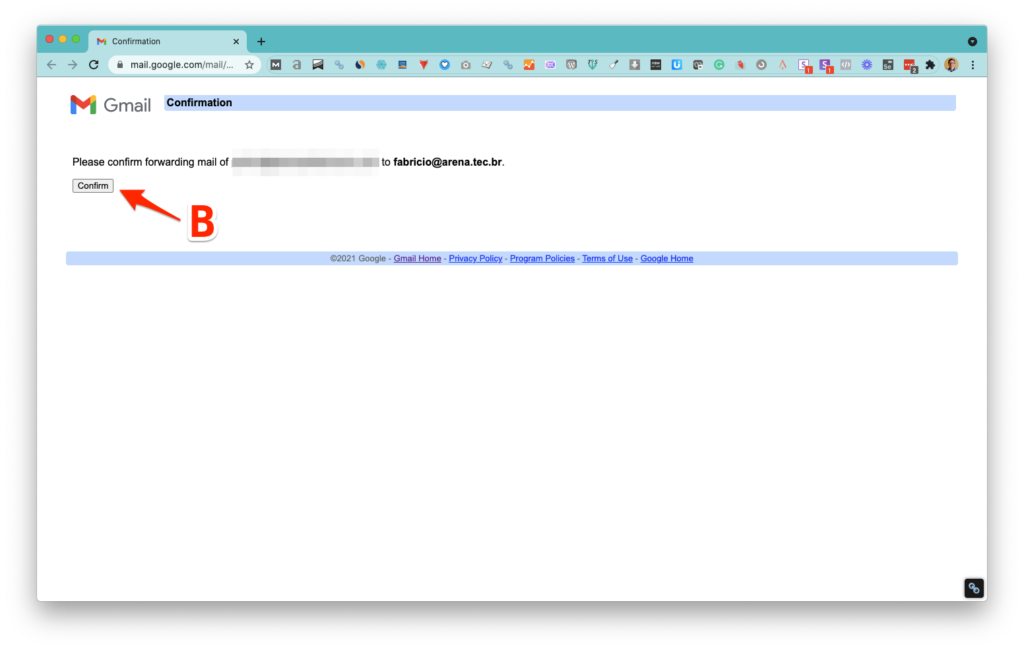
B) Click on Confirm.
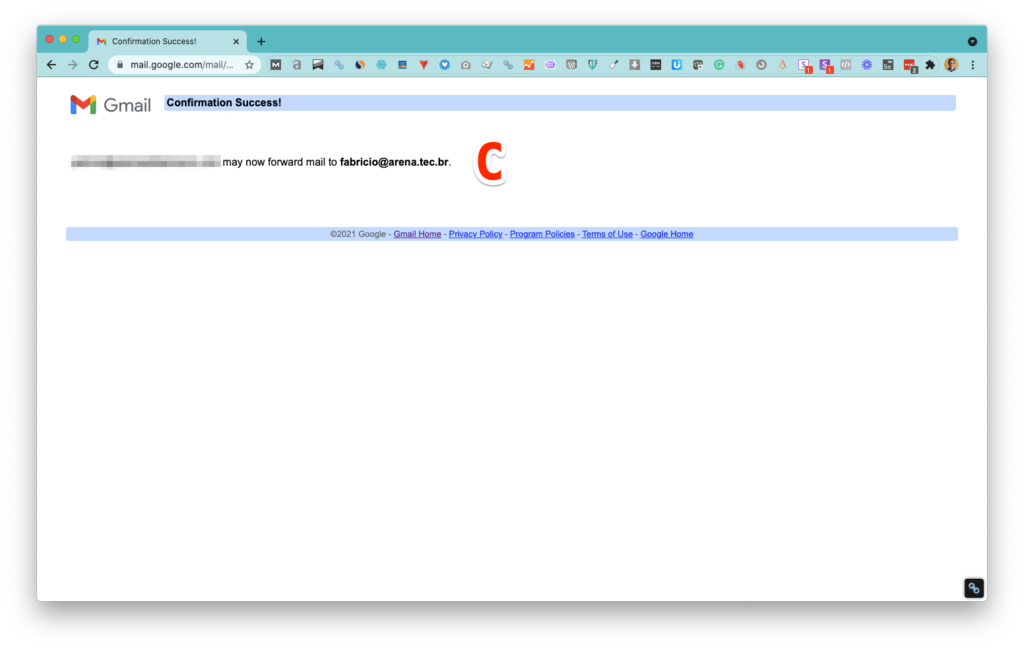
C) You should see a Confirmation Success message.
(If you’re a client of UniVirtua, please, send me an email to [email protected] letting me know that you completed this step.)
I hope this post helps your daily routine. What are your thoughts on this? Please, leave your comments below.
If you want to launch a professional cold email campaign, please contact us.

